
Happy Monday, friends!
We are so excited to be able to give you a little glimpse of all the work we've been doing in the kids' room. The nursery has to be cleared to make way for a new occupant at the end of the summer, and we decided that if they have to live together, the big ones will be forced to get along and love each other. Seems like that's got to work, right?
Leah's room was the very first one we actually took on when we moved into the house. Sweet little Logan was one week old, Leah was only three or four months out of her crib. {Yes, she was also two and a half. What? That kid loved her crib!} It was a sweet little room, done with lots of love. Perhaps a little rushed and a little premature, but as our first, we couldn't have anticipated how quickly she'd go from two to Big Kid.
 |
| Notice the ultrasound photo? All that stuff above her bed was stolen pretty much directly from the nursery. Wow did she outgrow it quickly! |

Now that we're moving Logan in, the goal is different: create a room that will grow with them and still be relevant in five years. Although it's quite possible the occupants of the room will change over the years, we're trying to create a space that will be functional for kids (note: I didn't say babies or toddlers! YIKES!)
So there's a few things happening. The first - and by far most important - is this lovely paneling that has been installed by my wonderful husband.

Isn't it fabulous?

It has since received a fresh coat of white {and looks ah-ma-zing if I do say so myself}, and the entire room has gotten a new coat of paint. New light fixtures, that absolutely awesome set of book shelves that I am so stinkin' excited about. More photos of all of that are forthcoming (probably when we're a little further along on the whole being finished front), but today, we're excited to show you our latest DIY project.

LOVE IT!
We were lucky that we didn't have to build this little nook; it is one of my favorite features about the room even though it's pretty tiny (6' x 1' - perfect for little hinies even though mine kinda hangs over the edge).
Here's what we used:
:: 6' x 1' x 1" pine board
:: 4" foam pad (by far the most expensive part of this project, by the way. Bring a coupon if you can)
:: 2.5 yards fabric
My plan was to simply put the board underneath the foam, but Casey had other plans. He wasn't thrilled with the way the edges came together. Instead, he carved out the center of the foam pad using our electric bread knife - which sounds crazy but worked like gangbusters - so that it fit snugly.

I'll leave it to your good judgement whether you're
We laid the fabric out smooth on the floor, which may or may not have taken a try or two, given all the help we get on our projects. I've mentioned it before, but man do we have helpful children. By the way, how much are you loving those chubby ankles? I know what I'll be checking out all summer!

With the foam/board on top, we simply aligned the fabric so that it was straight. Super easy to do if you have a pattern that repeats, not that easy if you're using stripes or chevron since it will show.

Once aligned, we simply used the electric stapler to secure the fabric to the board.

It took a little bit of doing to ensure that the fabric was smooth on the front, but we pulled the fabric tightly, wrapped it around and secured it, again with staples.
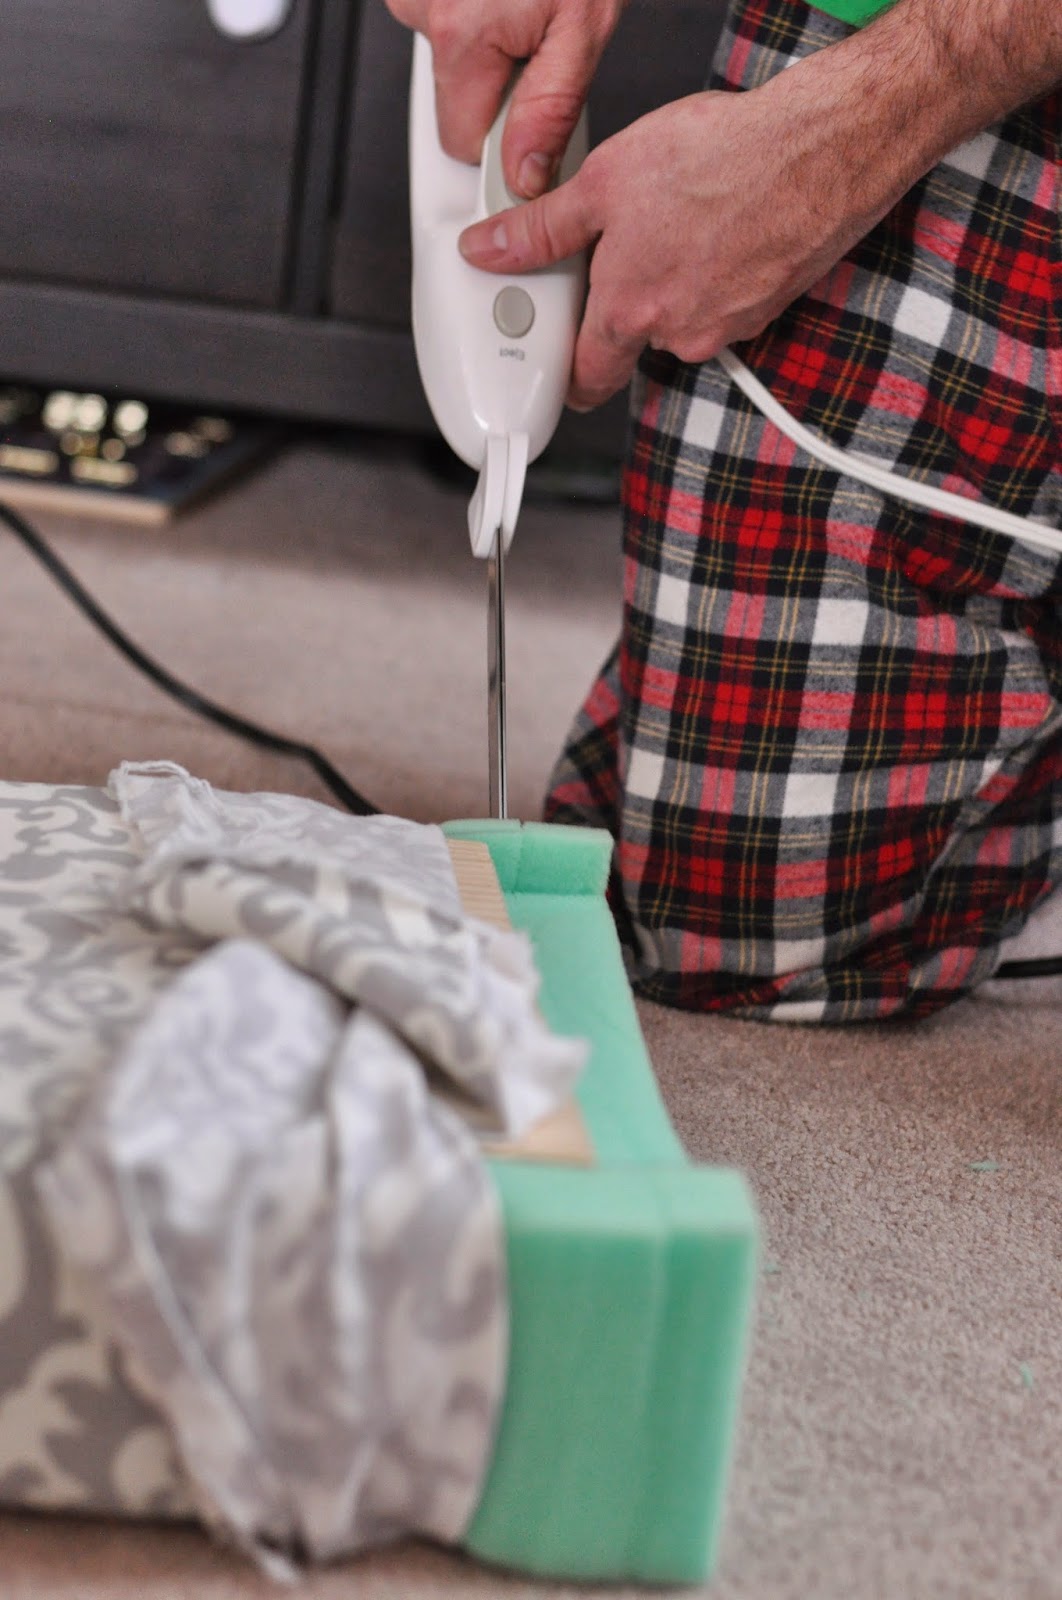
The foam was just a hair too long, so out came the handy bread knife again. To secure the ends, we wrapped them literally like a present and stapled. Yes, the underside is a total and complete mess...

...but it absolutely doesn't matter, since no one will see it! As long as the front looks good, we're golden. Casey also added L brackets to the back and sides to secure the bench to the wall.
So here we are. Before:

After:

And let me tell you, those kids are loving it!

Because, really... who wouldn't?!

I'll admit it: I'm completely, beyond excited to get all the pieces in place and finish this re-model. And that little guy up there? He totally gets that this is going to be his room too, and he cannot wait. He'd move in tomorrow, even if he had to sleep on the floor since the bunk beds aren't here yet.

Alright, one more sneak peek, because I can't resist:

I know. I can't wait, either.

No comments:
Post a Comment